Homemade Pizza Dough Recipe for Neapolitan Style Pizza
How to Make Homemade Pizza Dough Recipe Overview
Traditionally, the dough which originated in Naples, Italy used 4 basic ingredients. The best pizza flour possible, (“00”), yeast, water and salt. This homemade pizza dough recipe uses light olive oil to make the pizza not stick to surfaces and more easy to handle. Some American variations of this homemade pizza dough recipe have sugar that gives the yeast more to eat in doing its job of fermenting the dough, and it helps the crust brown just a little in the oven.
Making great homemade pizza dough is both science and an art. It involves exact measurements and quality ingredients, but timing, handling, weather and temperatures are variables to be juggled every time dough is created. It can seem intimidating, but with a little practice it is easily mastered. The Italian homemade pizza dough recipe in this article is designed to produce a dough to be used in a home oven for calzone, bread sticks, stromboli or something like a simple calabrese pizza, and the dough should be cooked at maximum temperature – 550 degrees if possible. For woodfired pizza ovens, get a higher moisture content which makes the dough a little more fragile.
Kitchen Equipment used to make this homemade pizza dough for Wood-fired Neapolitan style pizza:
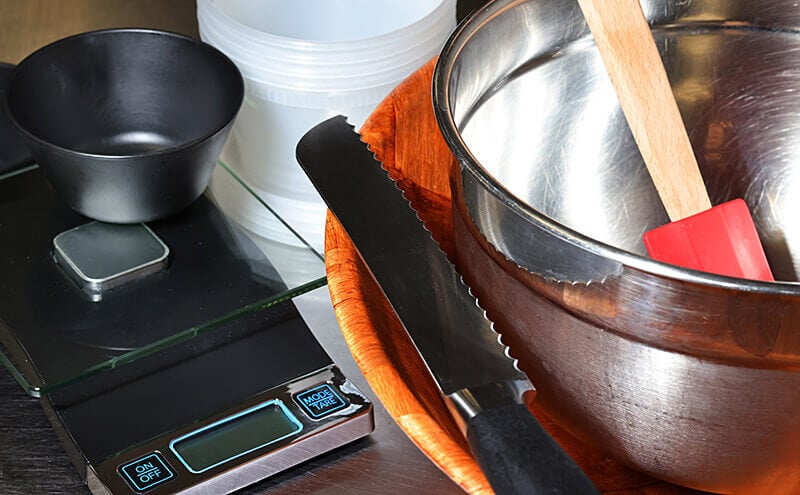
Homemade Pizza Dough Recipe Equipment.
Mixing bowls
Digital scale to weigh ingredients
Bread knife or dough cutter
Deli cups or trays to store dough while it’s rising
Ingredients for this Neapolitan style homemade pizza dough
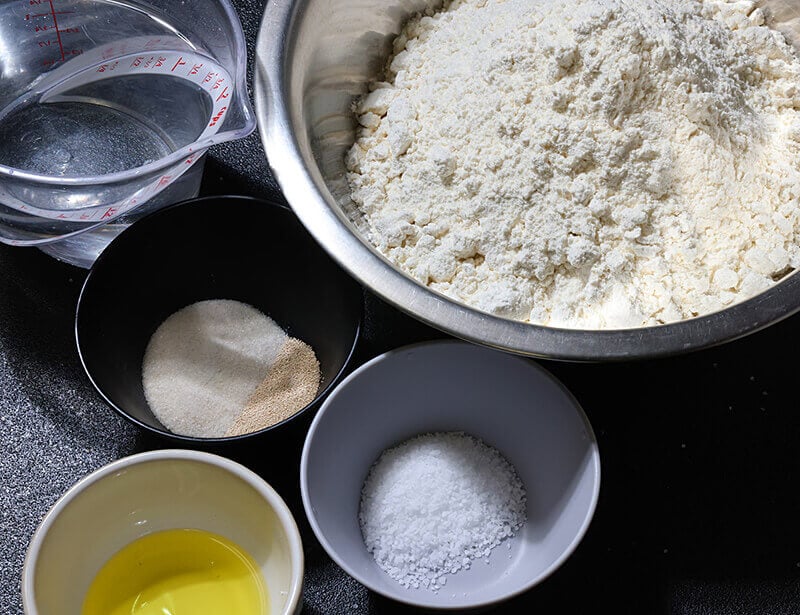
Homemade Pizza Dough Recipe Ingredients.
For baking professionals, the scientific breakdown of ingredients is as follows (using baker’s percentage). We can get into how to use this at a later date.
Flour: 100%
Water: 65%
Salt: 2%
Sugar: 2%
Olive Oil: 4%
Yeast: .4%
The following weights of ingredients are in keeping with the above proportions, and all you really need to know for this particular recipe. Weigh everything with a digital scale using grams, and highly recommend you do the same. Approximate volume measurements are provided but be aware that measuring flour is not quite as accurate.
592g “00” high protein Flour* (appx 3 cups)
355 g Ice cold water* (1 ½ cups)
18 g Salt (4 teaspoons)
2.5 g Yeast (½ teaspoon)
12g Sugar (2 ¾ teaspoons)
12 g Olive oil (2 ½ teaspoons)
* to the end of this blog for more information on flour and temperature control when using yeast.
How to Make Homemade Pizza Dough Instructions
Proof the yeast. It is a good idea to proof your yeast if you are not absolutely sure it is still viable (alive). Proof the yeast by dissolving the yeast and sugar in a couple tablespoons of warm water. You will put this into the mix later, so take away a couple tablespoons of water from the 355 grams. Let it rest for about 10 minutes in a warm location and then observe if it has begun to foam and smells like beer. If there is no foam and no smell, your yeast is probably dead.
In a large mixing bowl, mix the salt into the flour with a whisk distributing evenly throughout.
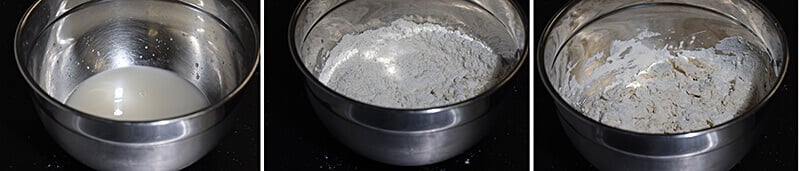
In a larger mixing bowl (big enough for all the flour and water), mix the yeast and sugar you proofed already, and the rest of the ice cold water. Whisk to mix well.
Gently put the flour & salt mixture into the bowl with the liquid.
Homemade Pizza Dough Mixing.
Mix with a wooden spoon until all the flour is damp. It will be chunky, don’t worry.
Let the homemade pizza dough mixture rest for 10 minutes so the flour can absorb the moisture before kneading.
Add the olive oil to the bowl and knead the dough until the olive oil is distributed throughout.
Then dump the dough onto a lightly floured surface for kneading. (You can also put the liquids and the flour into a mixer with a dough hook and mix until smooth and elastic).
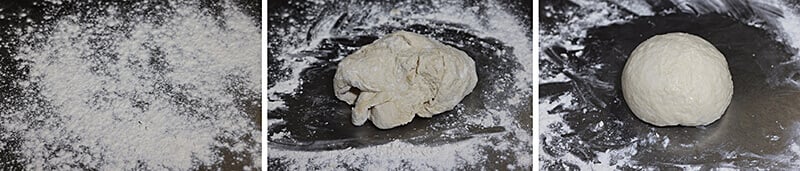
Homemade Pizza Dough Ball Forming.
Knead for 8 -10 minutes using a “push forward-fold-turn, push forward-fold-turn” motion. Try to stretch the dough as you squish it (push it) forward.
Dust with small amounts of flour if too sticky. Dough will be elastic and smooth when done.
Place the final dough blob into a large bowl sprayed with non-stick spray or coated with olive oil.
Coat the surface of the dough with a fine layer of non-stick spray or olive oil.
Place plastic wrap directly onto the surface of the dough and tightly wrap the bowl as well.
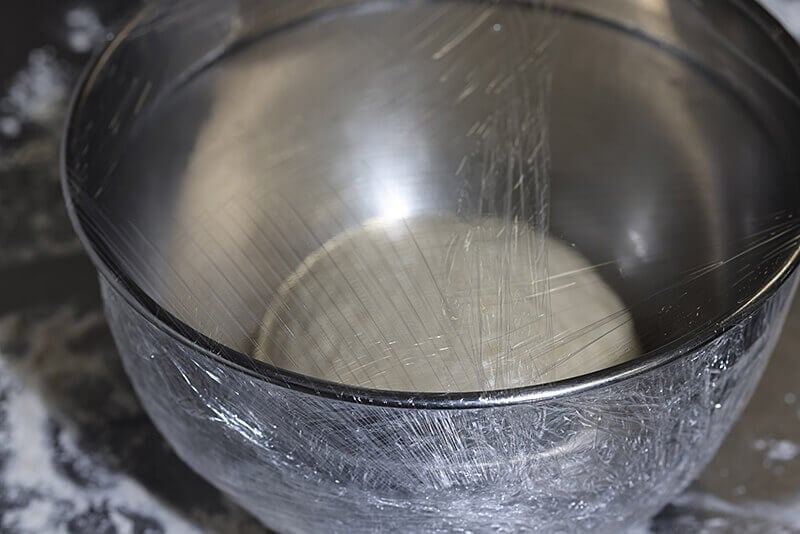
Homemade Pizza Dough Proofing /Rising.
Place the bowl of wrapped dough in a refrigerator for up to 3 days. It will be about twice its original size when ready. The slow rise will develop wonderful flavors and textures that you can’t get with a quick one-day rise.
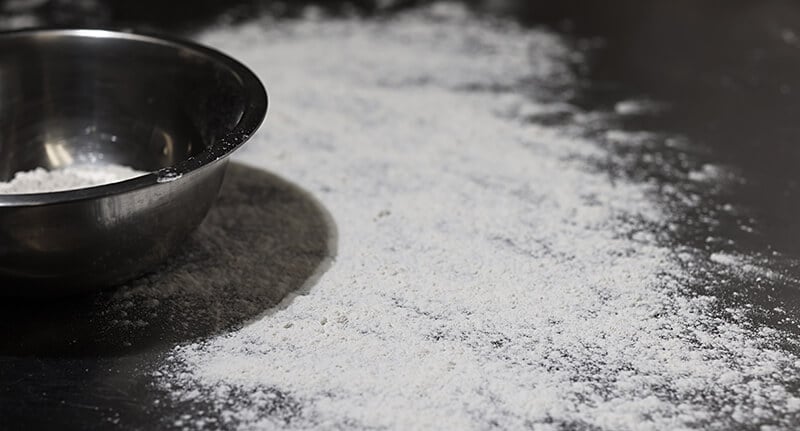
When the dough is ready, lightly dust a work surface and empty the dough from the bowl onto the work surface.
When the dough is just right, making a dough ball into a pizza crust is pretty easy. Again, there are so many techniques to do this, but for this blog describes the tabletop stretching method which cuts out a lot of anxiety. You don’t need to toss the dough or do mid-air magic to get this right. (Although picking it up and rotating it on the back of my hands and knuckles is my preferred and sure method!).
Form the dough into a long log shape so that you can divide the dough in even pieces.

Pizza Dough Stick.
This recipe calls for 4 dough balls at 9 oz each. You can just cut the dough into 4 equal pieces, or you can get really precise and weigh each piece if you want.

Homemade Pizza Dough Cutting.
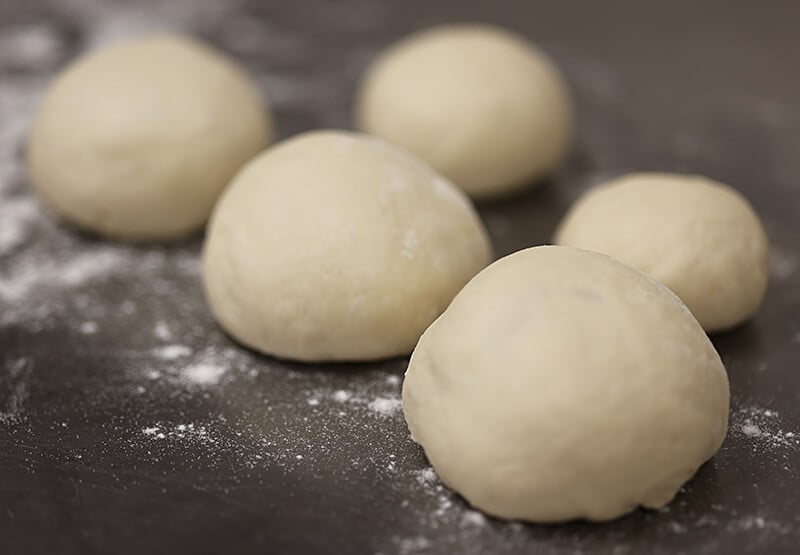
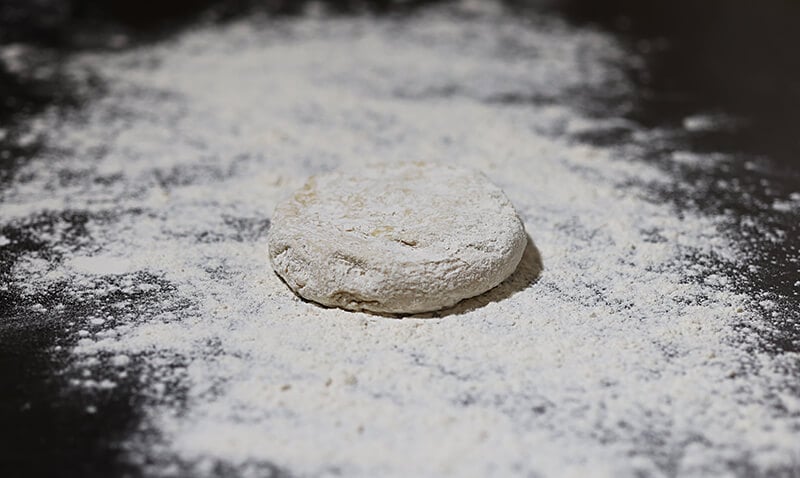
Now that you have the final sized homemade pizza dough balls, you will need to roll each into a tight smooth ball. There are so many techniques to do this. If you are just learning, pull the dough toward you, pinching the lower edge of the dough between the table and the side of your hand. Your hand will be positioned as if you were holding a cup, pinky and edge of your hand pushing down onto the surface as you pull.
Pull once, move the ball back to the starting place and rotate, pull again, put back & rotate, pull again. 3-4 pulls are all it should take to get it tight, round and sealed.
The whole idea is to stretch the outer surface of the ball into a tight, smooth surface, without trapping air and bubbles inside.
Place these dough balls on a tray, coat with olive oil and cover with plastic wrap. Let rest at room temperature for 2 hours before using.
When the dough is ready to stretch, dust the countertop or hard surface with flour.
Homemade Pizza Dough Recipe Table Dusting.
Put the dough ball into a bowl of flour and coat both sides.
Homemade Pizza Dough Disc.
Shake the excess flour off, then place the dough on the dusted surface.
Begin to flatten and stretch the dough flatter and round.
Keep a thicker rim around the outside (don’t press all the way to the edge when stretching).
Keep stretching with both hands outward as you turn. Be careful to not stretch the dough too thin, but it can hold up pretty well to aggressive stretching.
Now you’re ready to make pizza!
Use this artisan homemade pizza dough recipe as a base for calzone, bread sticks, stromboli or something like a simple margherita pizza. Remember that having a great sauce makes for any great pizza. You can use traditional Neapolitan pizza sauce or a white pizza sauce recipe.
Notes about Homemade Pizza Dough Recipe Ingredients
*About “00” Flour: We want to use the best flour for the job. For Neapolitan pizza, it is a high protein “00”, also called doppio zero flour. It’s not as common as grocery store AP flour, and costs a bit more. Here in the US, we categorize flours by how much protein they contain, which directly affects the gluten formation in whatever we’re making. They do it a little differently in Italy and other parts of Europe by categorizing flours based on how finely the flour has been ground. Coarsely-ground type “2” flour is at one end of the spectrum with powder-fine “00” flour at the other. Here in the US, we tend to assume finely ground “00” flour is probably low-protein (like our finely-ground cake and pastry flour). In fact, the protein content of “00” flour can range quite a bit depending on what kind of wheat it’s ground from. Most “00” flour that we see in the United States is ground from durum wheat and has a mid-range protein content of about 11-12%, similar to all-purpose white flour. Besides the level of the grind, the other big difference between “00” flour and all-purpose flour is how the gluten in each flour behaves. The gluten from durum wheat flour tends to be strong but not very elastic, while the gluten in red wheat flour is both strong and elastic. All this said, all-purpose flour will work for homemade pizza dough. You will however get better texture and performance from a high protein “00” flour made from quality wheat kernels. Here in Northern California we have one of the finest mills in the country. Guisto’s is a family mill that knows the difference. I have been using their high protein “00” flour for pizzas for about 10 years. They also make an organic “00” which is even better, but harder to find. There are good, imported flours available at grocery stores,like Caputo “00” or other brands.
*Temperature control and yeast: Temperature is a very important factor in the fermentation process. Yeast is a living organism which has one job really, to expel gas. It does this by consuming sugars in the flour, and then expelling the carbon dioxide. Yeast can work really slow in cold temperatures, like in a refrigerator, and super-fast like in an oven. We want slow fermentation with this homemade pizza dough, as this is the stage where complex flavors are developed. So when I mix dough, I like to use ice cold water to prevent the yeast from getting a head start. On a hot summer day, making large batches of dough, ice cold water is almost essential to keep the dough from getting out of control. I even use flour which is kept in the freezer to help with this. Three days in the refrigerator seems to be just about right for flavor and proper rise. Longer than 4 or 5 days, and the dough starts to lose integrity and will not hold up to stretching without holes. The gluten structure holding it all together breaks down as the fermentation process continues.
After graduating from LeCordon Bleu at the top of his class Chef Randy dove head-first into a culinary career working in many top-tier restaurants including the Golden 1 Center Arena as a lead cook. He later owned and operated a mobile woodfired pizza concept where he championed whole and natural ingredients. Chef Randy is passionate about healthy food and developing relationships with local providers for true farm-to-fork food production.